Working with Clips
Clips are the basic unit in Callie Grams. A clip is a button that plays an audio file, a playlist, or a special action like Stop All.
Adding Clips
Section titled “Adding Clips”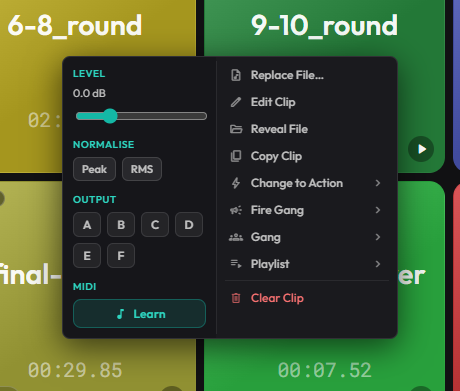
Right-click an empty button in the grid and choose Add Clip, then select an audio file.
You can also record straight into a slot: right-click an empty button and choose Record Clip… — see Clip Recorder.
Supported formats:
- WAV
- MP3
- FLAC
- OGG Vorbis
- AAC / M4A
If a clip’s audio file is moved or deleted, the button flashes red and shows Media Missing. Restore the file (or right-click → load a replacement) to recover the clip.
Clip Settings
Section titled “Clip Settings”Right-click a clip and choose Edit Clip to configure it. The modal opens on the Editor tab; use the tabs at the top to switch between General, Playback & Audio, Editor, Triggers, and Stems.
General Tab
Section titled “General Tab”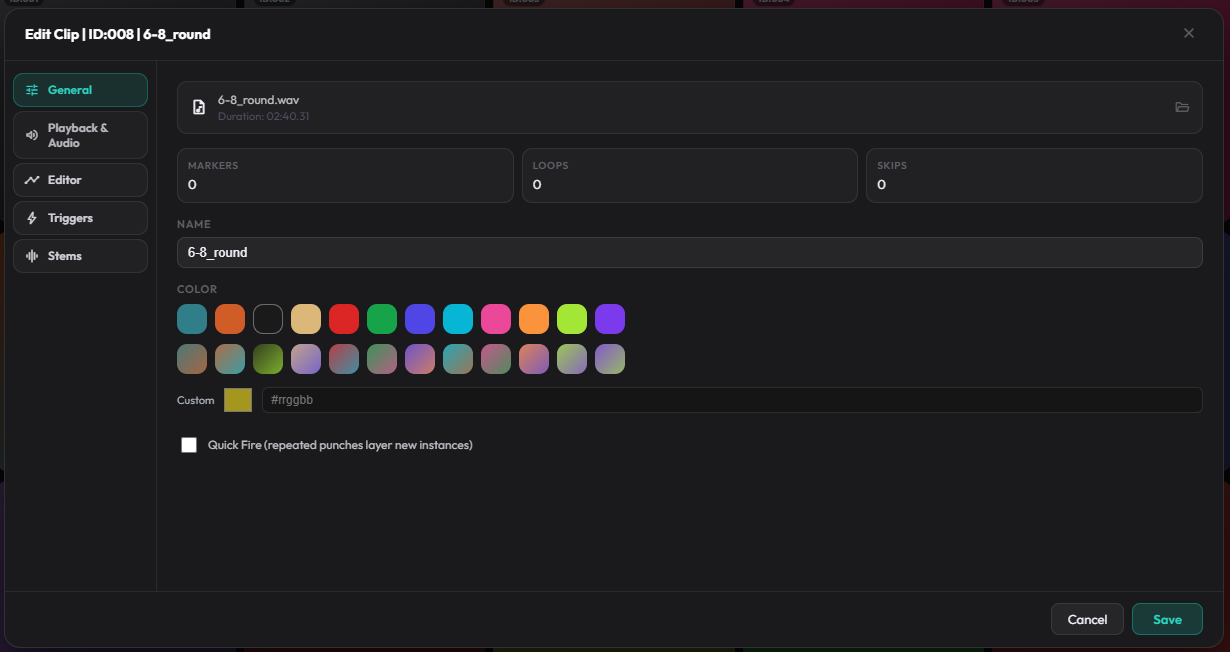
- Name — the label shown on the button.
- Color — background color. Use a gradient end color for a two-tone button.
- Shortcut — single-key keyboard shortcut.
Playback & Audio Tab
Section titled “Playback & Audio Tab”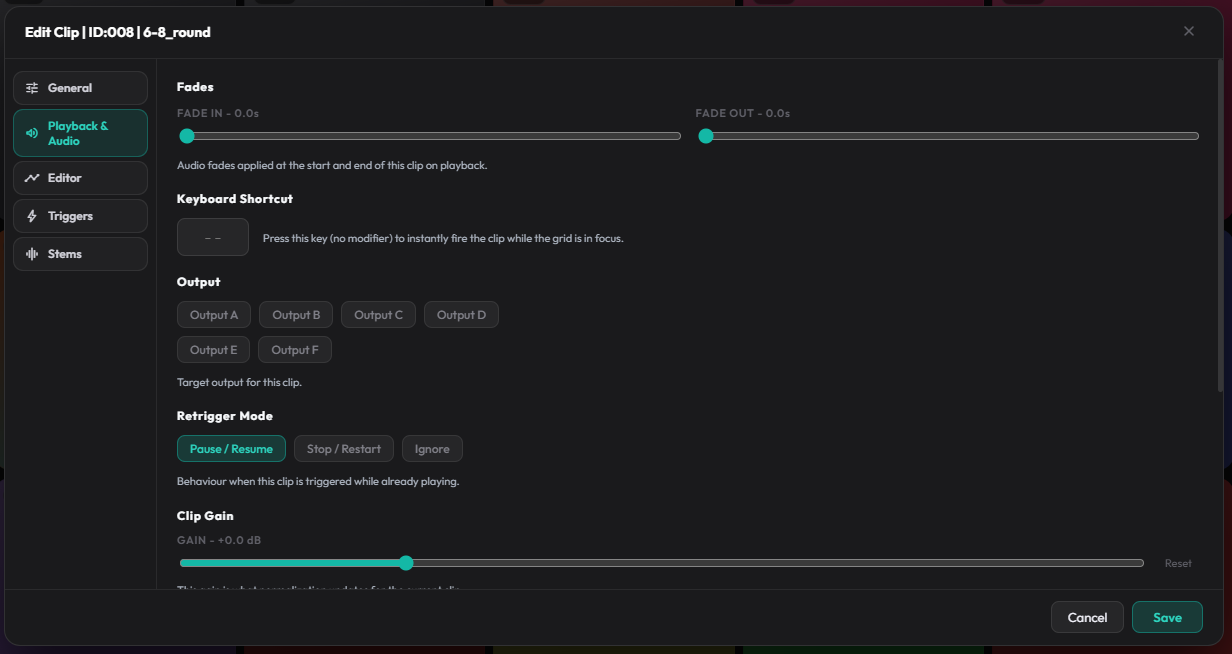
- Output — target output letter (Default mode only).
- Slot — position within the output, shown as
1a,2a, etc. - Fade In / Fade Out — smooth the start and end of playback (0–10 seconds).
- Clip Gain — per-clip level adjustment in dB. Double-click the gain slider to reset it to 0 dB.
- Playback Speed — per-clip varispeed from 0.10× to 2.00×. Takes effect on the next play, pitch follows speed, and the total running time (TRT) is recalculated. A ×1.25-style badge shows on the button when speed isn’t 1.00×. Double-click the slider or press Reset to return to 1.00×.
- Protected from Stop All — the clip keeps playing through Stop All. To stop a protected clip anyway, Shift+click Stop All (or Shift+click a Stop Output button).
- Quick Fire — layer new instances on repeated triggers.
- Retrigger Mode — Play/Stop (default), Pause/Resume, Restart, or Ignore. Also available from the Retrigger panel in the right-click context menu.
Editor Tab
Section titled “Editor Tab”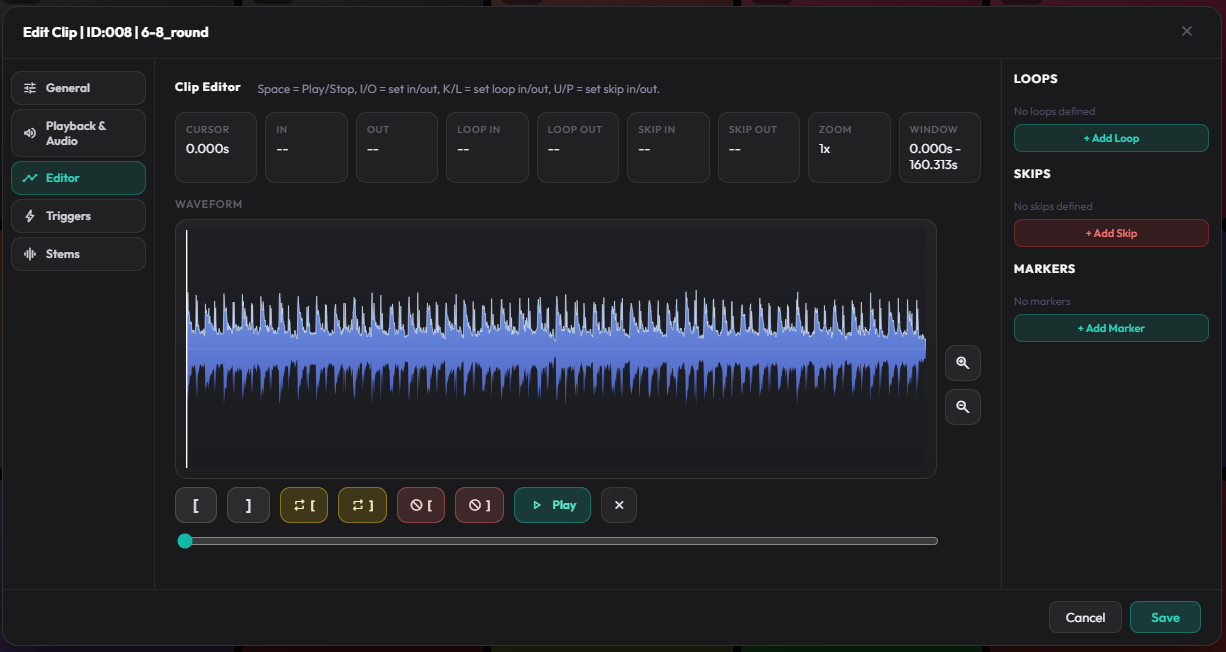
See Clip Editor & Markers for details on:
- IN / OUT markers
- Loop blocks
- Skip blocks
- Playback markers
Triggering Clips
Section titled “Triggering Clips”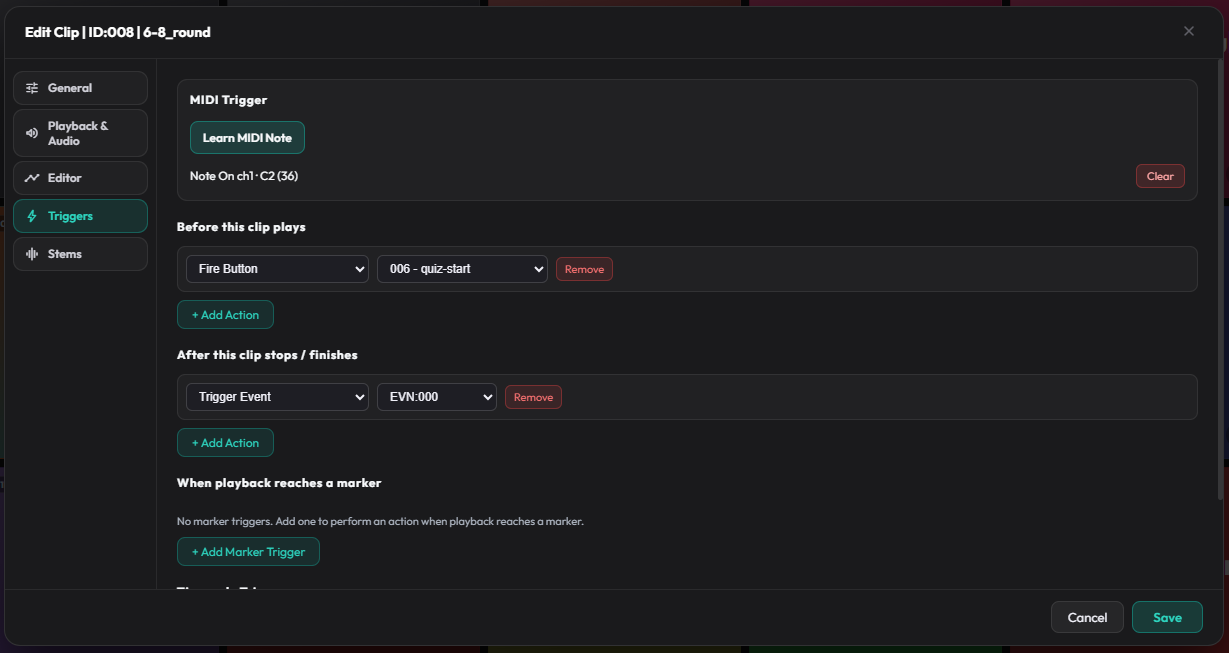
- Mouse: click the clip button.
- Keyboard: press the assigned shortcut key.
- Stream Deck: press the matching button.
- MIDI: send the learned MIDI message.
- Web API / OSC: trigger remotely.
- Timecode: when a timecode cue is configured.
Stopping Clips
Section titled “Stopping Clips”- Click a playing clip again (depending on retrigger mode).
- Click a looping clip to release the loop — the clip follows its configured loop exit action instead of retriggering.
- Press Stop All to stop every clip immediately (except clips protected from Stop All — Shift+click to force).
- Use a Stop All, Stop Gang, or Stop Output button in the grid.
- Send the Stop All event via API:
POST /api/v1/events/EVN:000.
Copying and Pasting Clips
Section titled “Copying and Pasting Clips”Right-click a clip → Copy, then right-click a destination → Paste.
Paste options:
- Full — paste everything: name, color, file, output, loops, markers, etc.
- Clip Only — paste only the media reference and reset all other settings.
Clearing a Clip
Section titled “Clearing a Clip”Right-click → Clear Clip to remove the clip from a button without deleting the audio file.
- Use color coding: blue for music, red for sirens/stings, green for voice-over.
- Keep names short so they fit on Stream Deck buttons.
- Test Quick Fire on stings before show day — layering can get loud fast.
- Save often. Callie Grams can save projects as
.cpackAudio Packs for portability.